|
I had a little bit of time some I thought I would build my wife a step stool for the kitchen, after all she is only 5' tall. I started with a small Poplar board that I had lying around and cut the steps and sides to finished length. 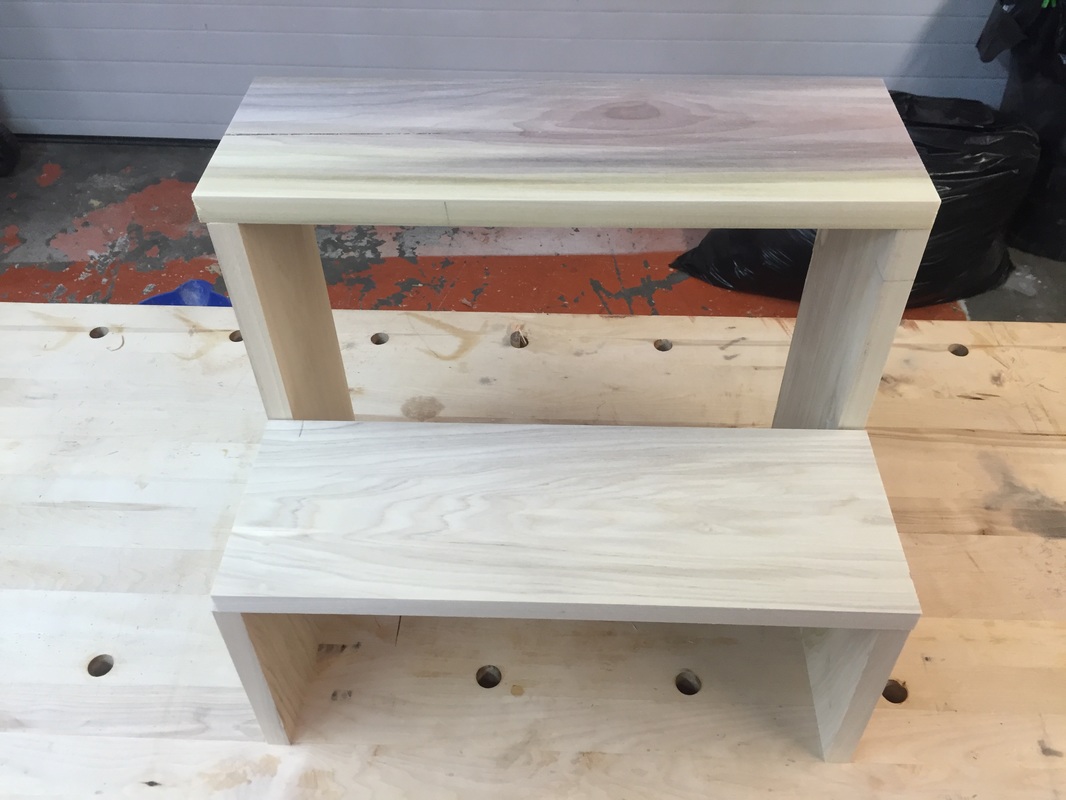 One of the boards had a crack on the end that I needed to deal with. I decided on a standard bow tie but with a curve on the ends. 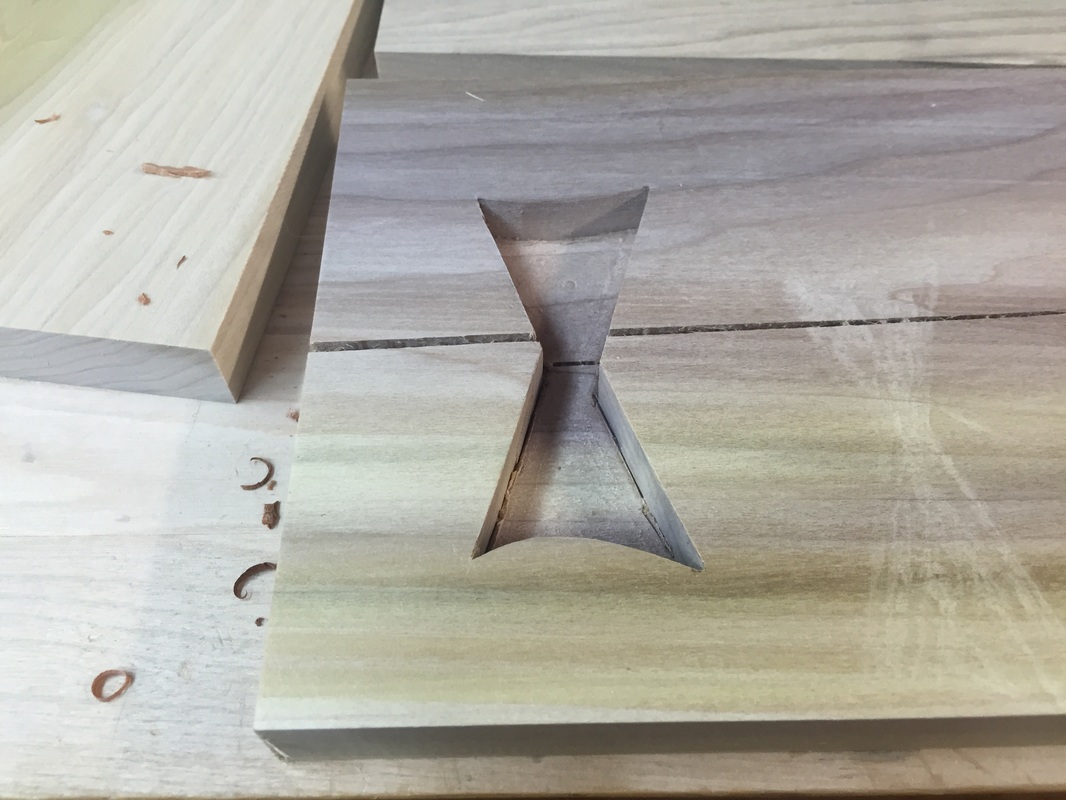 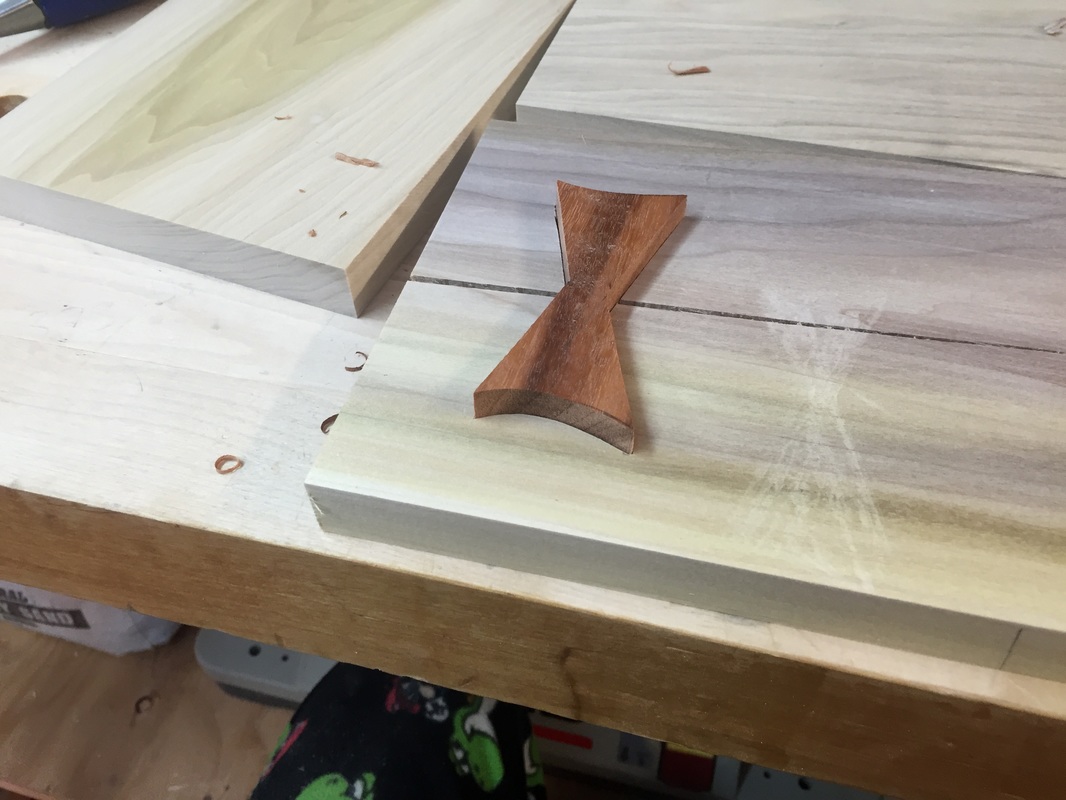 The next step was to hand cut the dovetails and then glue the 2 pin boards together. 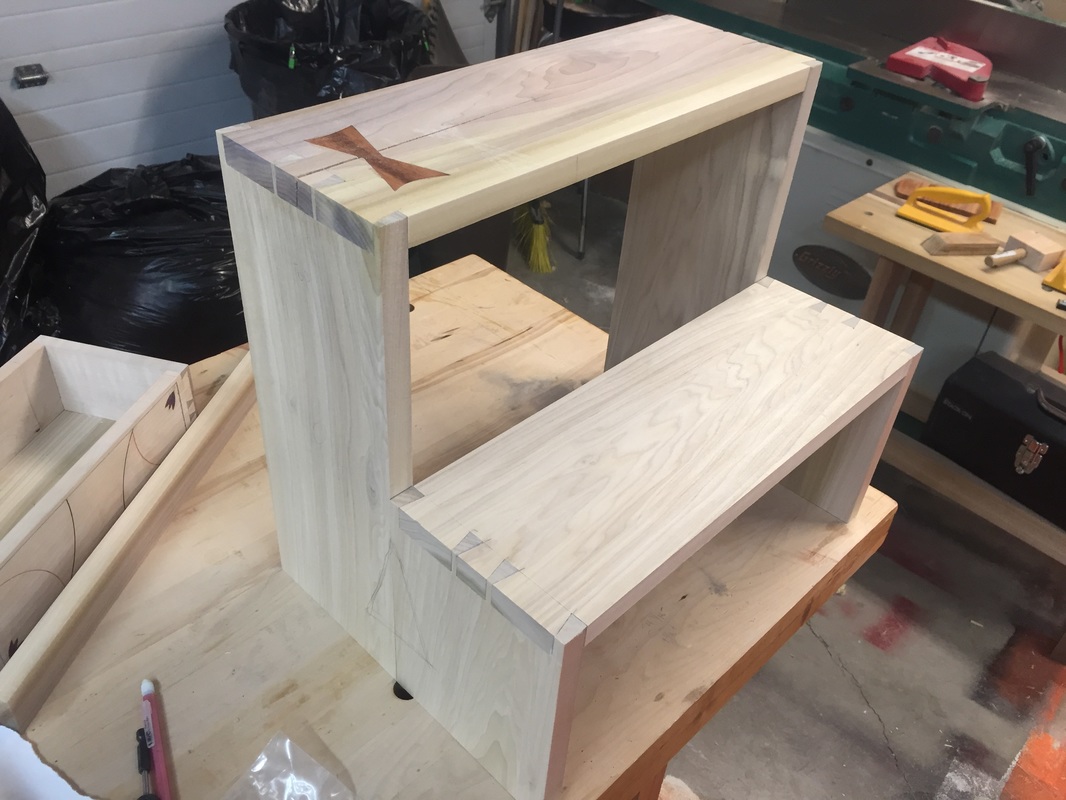 I needed to add a stretcher in the back to help keep the stool from splitting apart when you stand on it. 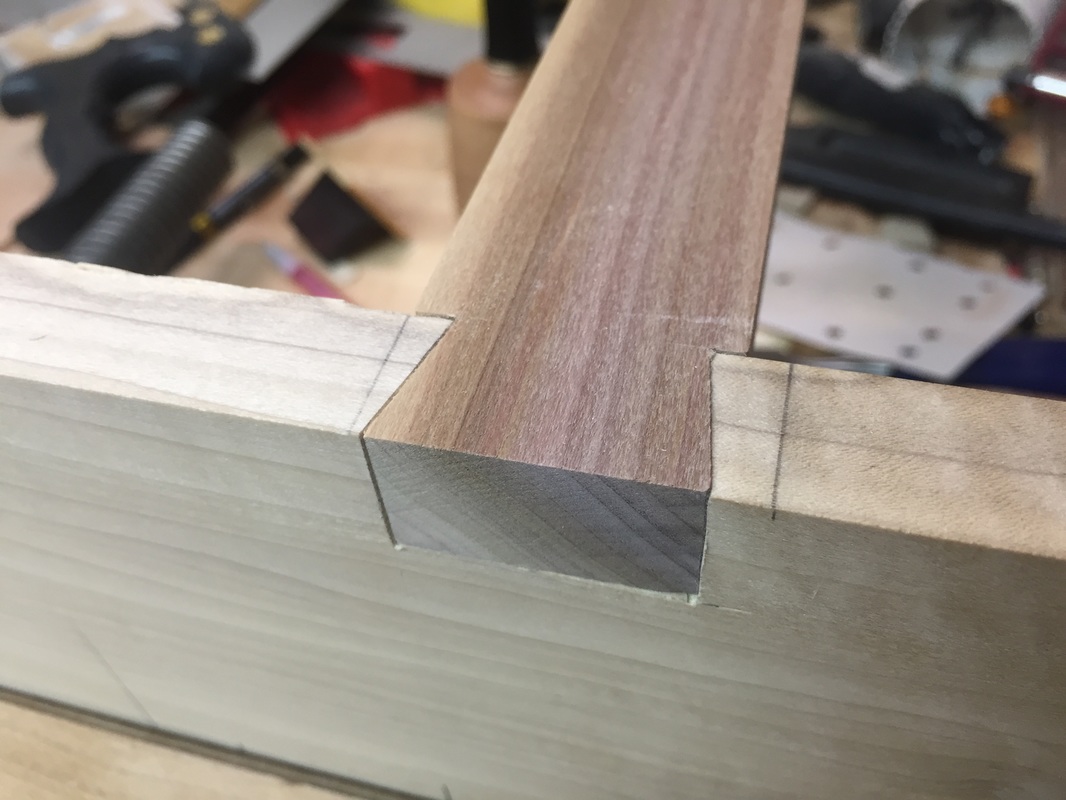 Before I was done with construction a new studio lighting kit that I had ordered came in the mail and I was eager to check it out! 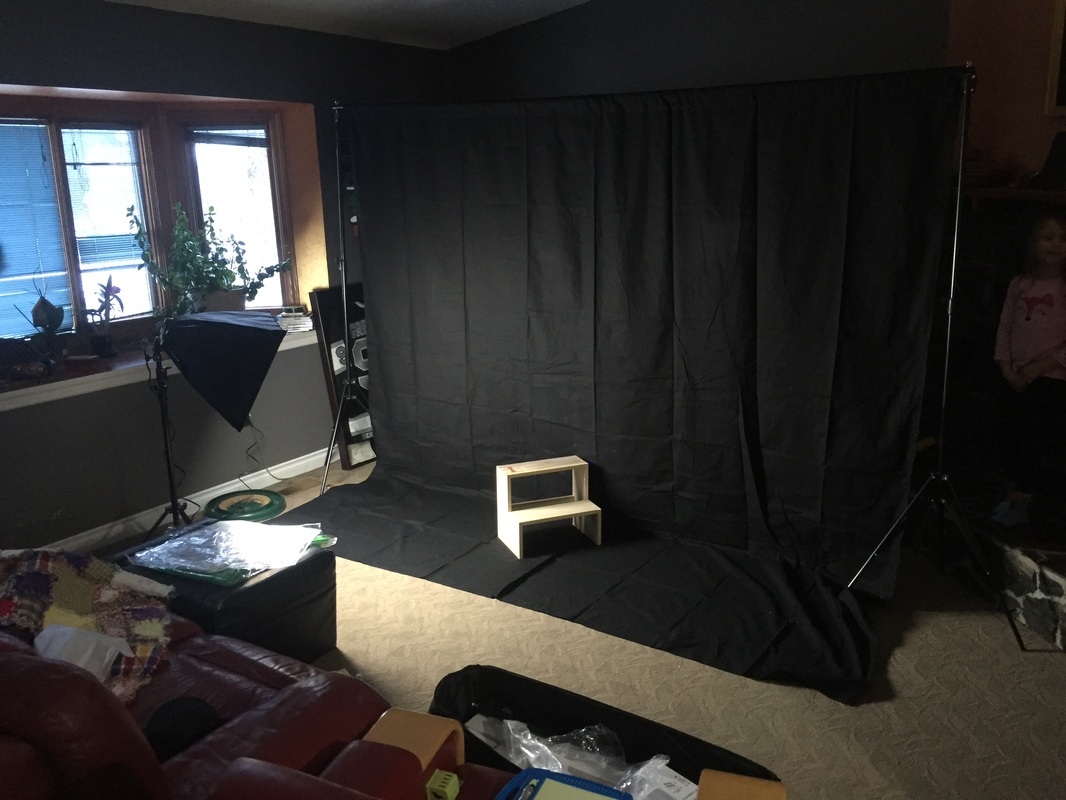 Put 2 coats of Danish oil on and she is ready for delivery. 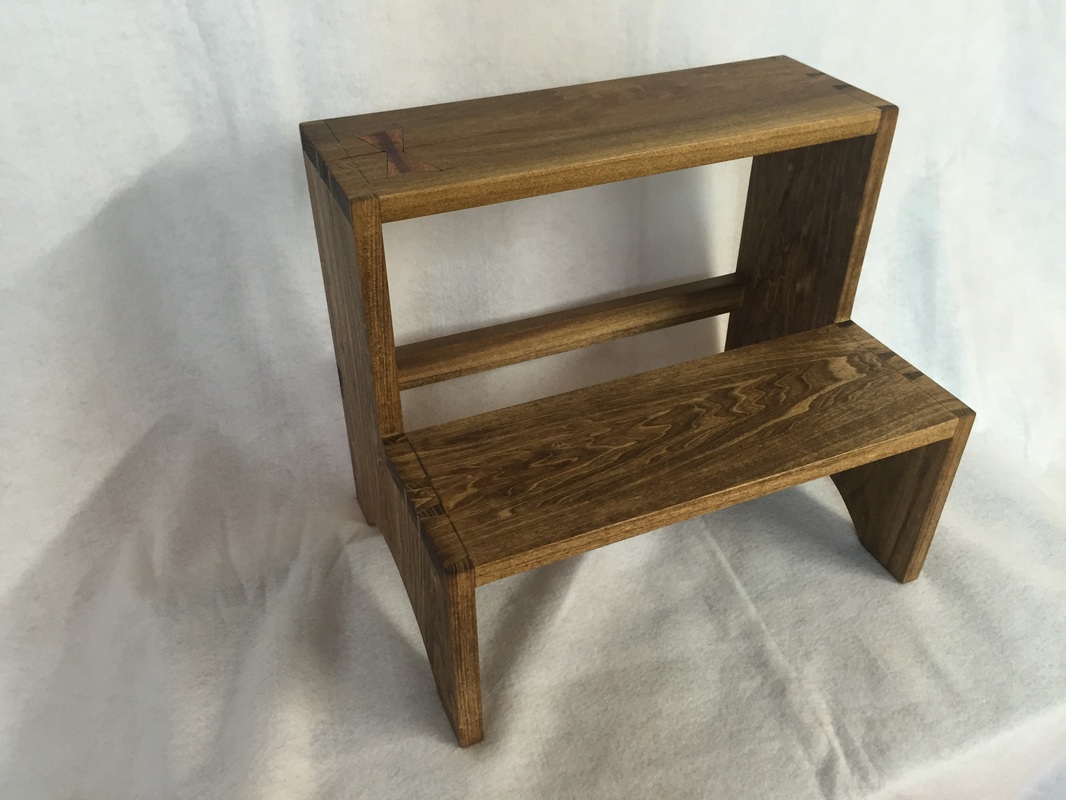 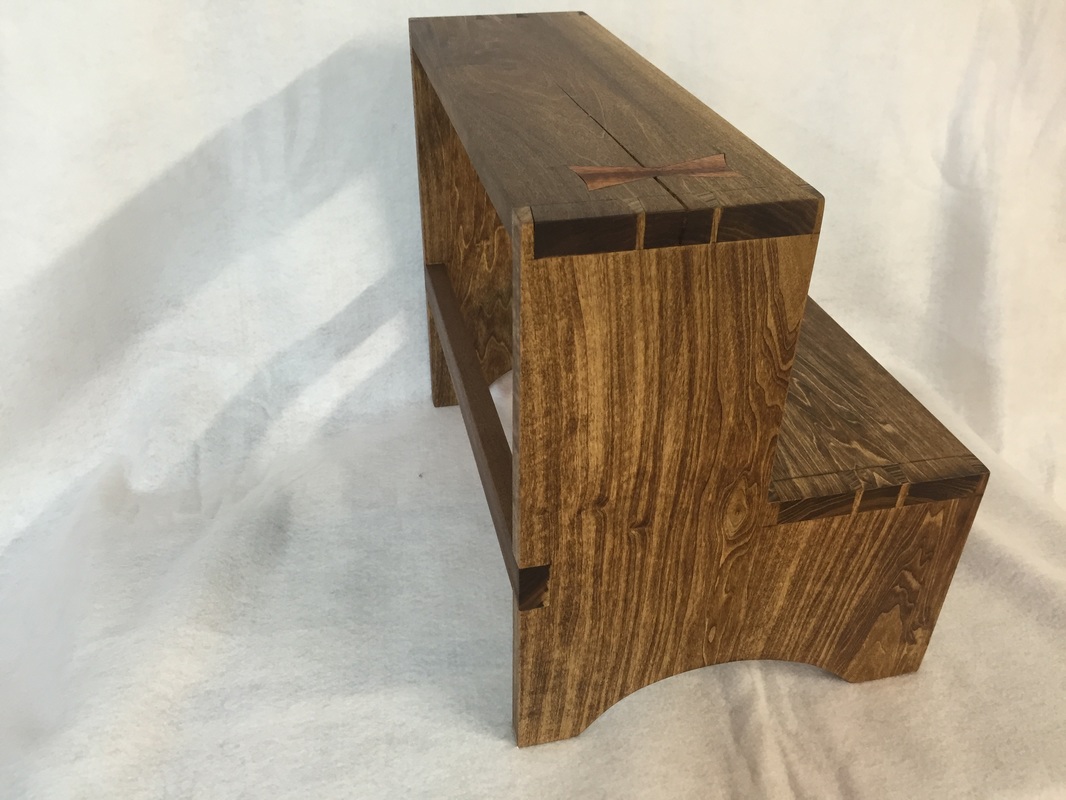
2 Comments
The basic construction of the crate is done now I can work on outfitting the inside, which is the fun part. I used a router with a V groove to rout the design then I filled it with orange acrylic paint and sanded the top off. 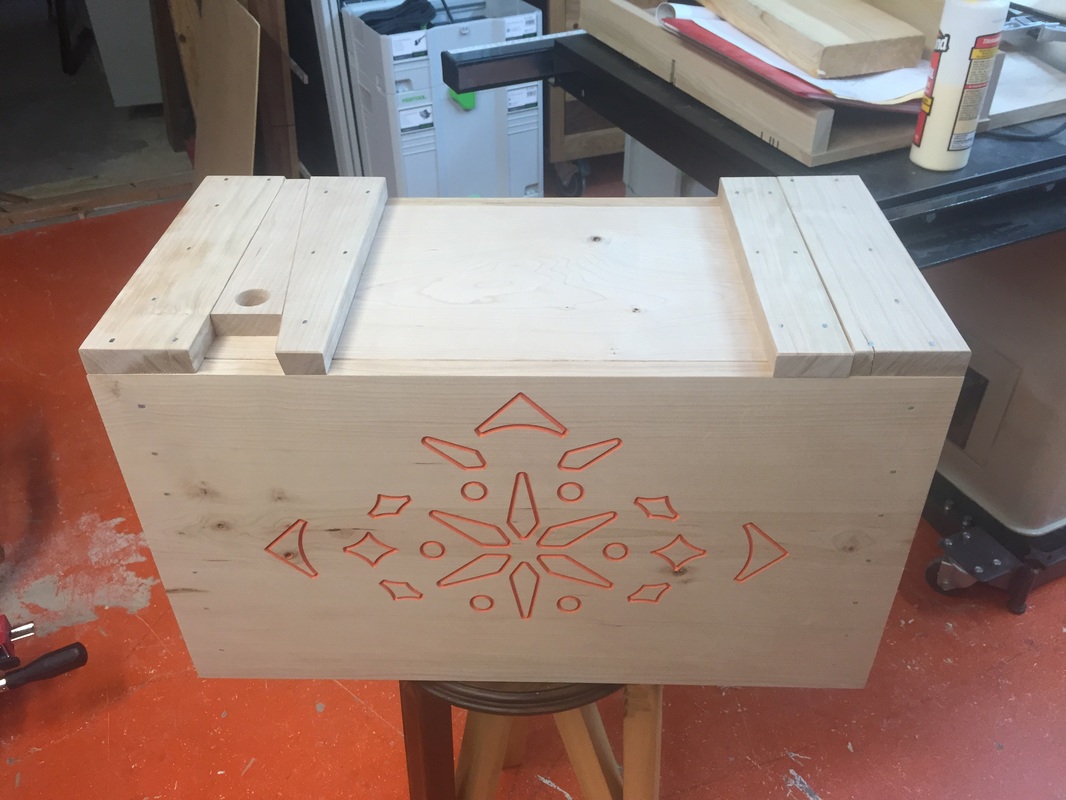 I started form the bottom up by adding a saw till and a divided area for hand planes. 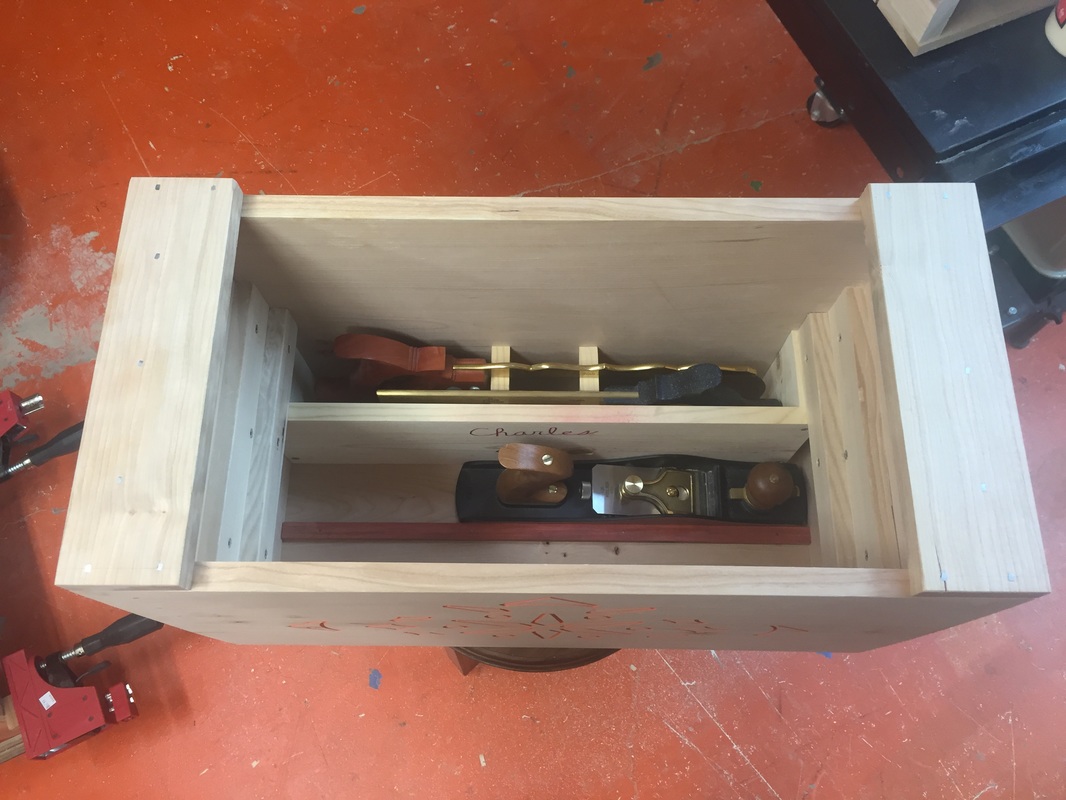 Next I added a few sliding trays to store the loose tools and marking gear. 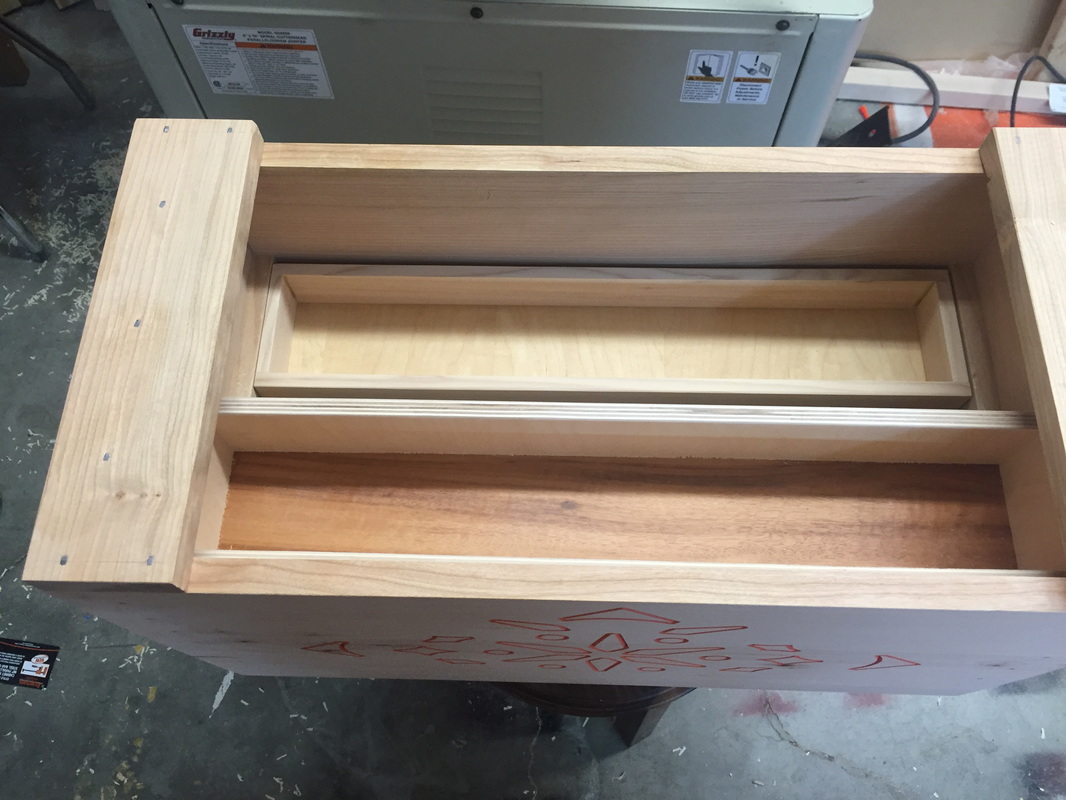 All done! Now I need to fill it with tools.
I don't think any of us have enough tool storage but I am happy to say I think I'm getting close! A couple of years ago I built a rather large workbench with 21 drawers, now this managed to supply almost all of the hand tool storage that I needed but something was missing. About a year later I built a Dutch tool chest in a class taught by Chris Schwarz, I liked this chest because it keep my most used tools at arms reach. The problem is that when the chest is loaded with tools it is very heavy. And for a chest that is supposed to be mobile this was a problem. There was no way I could carry it by myself to and from shows and classes. All of this brings me to today's project, a Japanese Tool Crate. It is about 30% smaller than its Dutch counterpart and is quite a bit easier to carry. 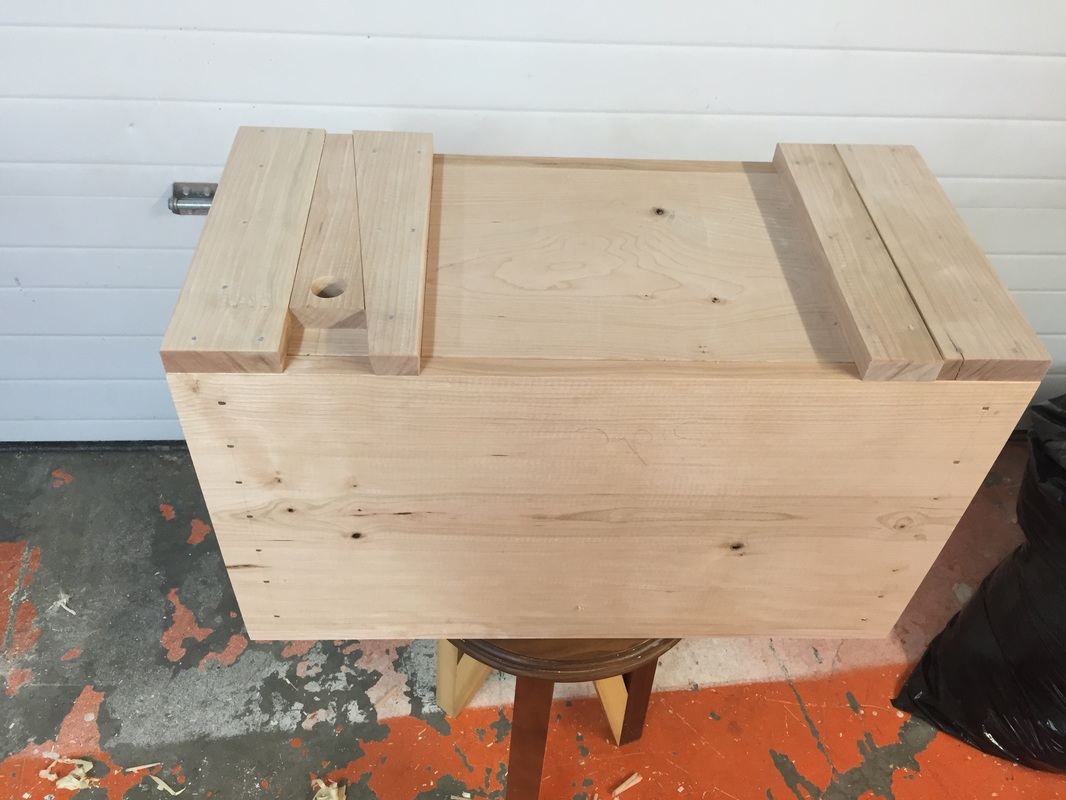 It uses a wedged lid system to lock the lid in place and prevent any tools from falling out if it tips over. All of the pictures I found showed them put together with nails, so I figured when in Rome, building a Japanese chest, to replace a Dutch one, I should use English cut nails. It made sense to me. 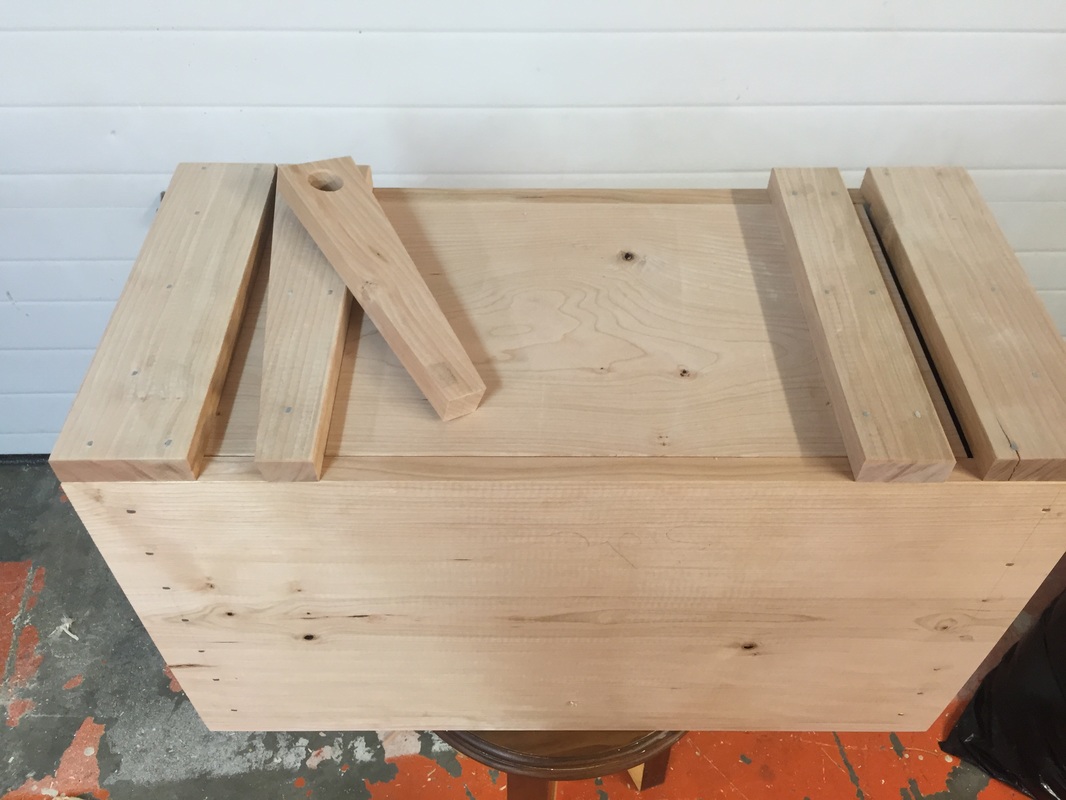 I also put Teak runners on the bottom. They will keep the cherry off the ground and teak can handle water like a pro with no finish. 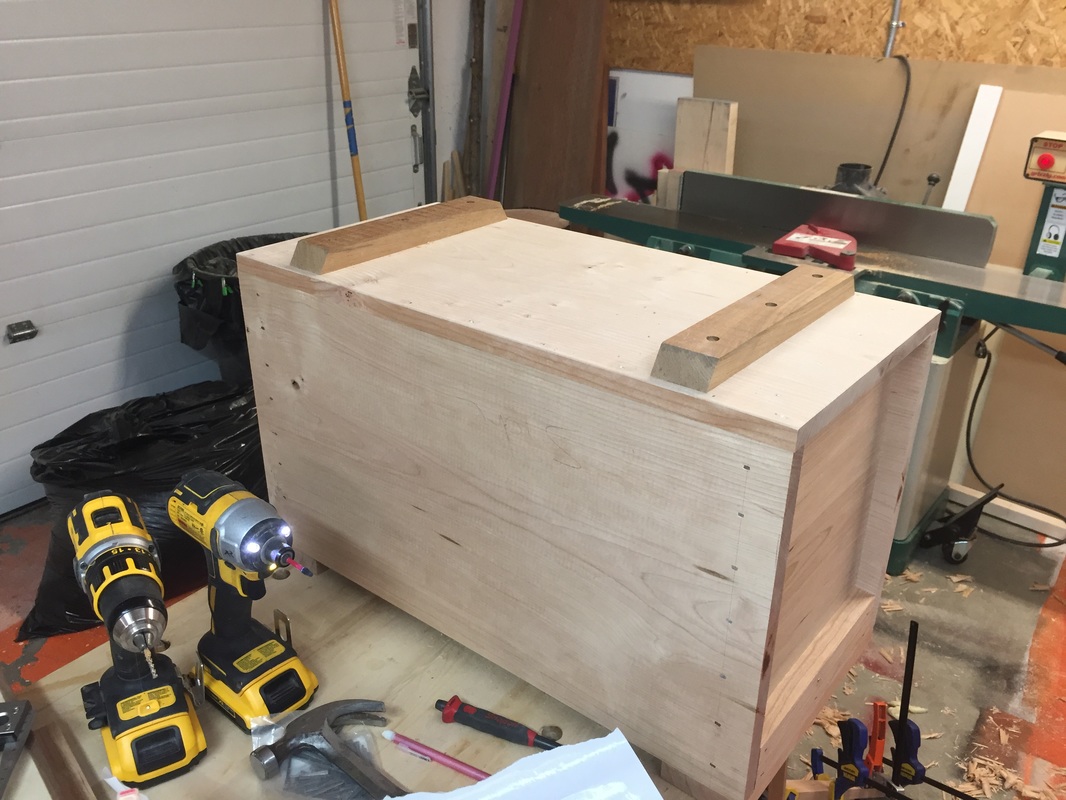 I will work next week on outfitting the inside with saw tills and racks for chisels and layout tools etc...
|
AuthorGoogle told me that if I started a blog my page ranking would go up! So here it goes. Archives
March 2016
Categories |
 RSS Feed